The user account on WAX Blockchain is the gateway to one of the most ambitious and powerful web3 experiences that blockchain technology offers us today. WAX, with more than 14 million accounts created and with the highest transaction rate in the entire blockchain ecosystem, is one of the most attractive options for the video game industry and the collections of NFTs in general.
WAX Cloud Wallet (WCW) has undoubtedly been key to the success of user expansion in this blockchain. Its ease of creating an account just by logging in with a classic mail service, such as Gmail, and its ease of management, being a guarded wallet, has allowed to break the access barrier that involves technical knowledge about the creation and management of the accounts themselves.
However, many users have grown up on the blockchain and feel like going further, to places where their WCW account cannot reach due to its intrinsic key custody system.
But this has changed thanks to the latest updates from the WCW development team.
User accounts, passwords and Wallets guarded
An account allows you to identify a user or entity, such as a smart contract. Accounts have permissions that authorize them, or not, to use actions from other smart contracts. Beads can be between 1 and 12 characters long and can only include the lowercase letters a-z, numbers 1-5, and the period.
If, for example, a smart contract allows an action to mint an NFT and a user wants to mint that NFT, the user must have the appropriate permission associated with it and must also be able to demonstrate it.
To prove the possession of the accounts and the rights to use the associated permissions are the account keys. The keys are managed in pairs having for each type of associated permission a public key and a private key.
The basic permissions for an account are “Owner” and “Active”
- Owner: Authorizes account ownership operations, such as changing keys for any other permissions, creating permissions, etc. The keys associated with this permission should never be used in third-party applications to identify themselves or perform generic tasks.
- Active: Generic permission for the usual operations in the blockchain.
In addition to these permissions, it is possible to create more permissions associated with the account, with their own key pairs, to limit them to the use of specific actions against specific smart contracts.
WCW is a guarded wallet, that is, the custody of the private keys is done by the wallet and the user has no control over them. This practice has its advantages and disadvantages:
Advantages:
- It frees the Nobel user from the task of guarding and managing the keys to avoid forgetting, losing or stealing them.
- It offers a method of identification and access to the applications more friendly and available anywhere since it only requires the login method used to create the account through a pop-up web window.
Inconvenience:
- Use of the account is limited to WCW’s own options and features.
- If the WCW service were hacked all the guarded keys could be exposed.
For most users the use of WCW as a custodial wallet is sufficient, but if the user requires a higher level of usability, which implies the use of the private keys of the account, he can request the transfer of custody partially or completely.
Claim your WAX Cloud Wallet account
The first thing we’re going to do before claiming a WCW account is to generate two key pairs for the Owner and Active permissions. For this we can use the official WAX Blockchain Explorer (The Official WAX Blockchain Explorer)
We will go to the menu Wallet (1), Utilities (2)
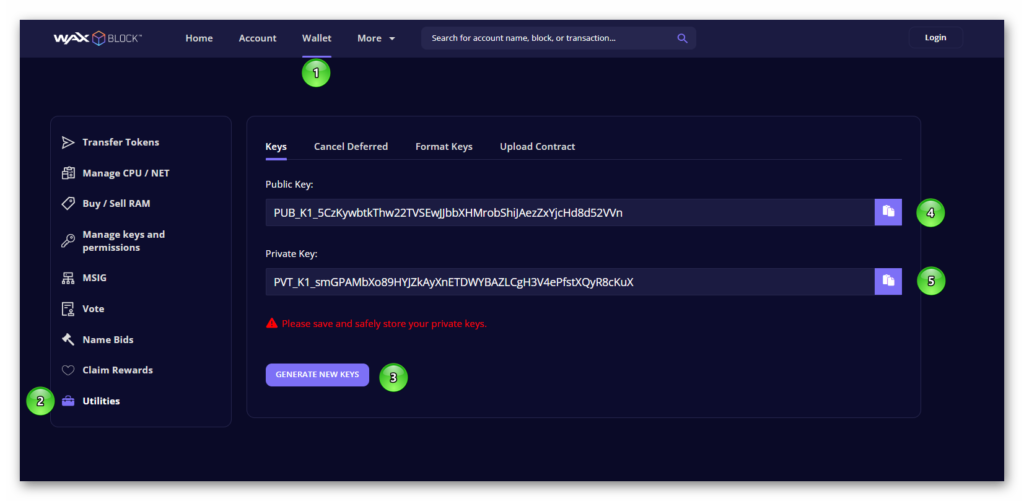
Next, click on the “Generate new keys” button (3). We can click several times to generate different keys, in case we want to ensure more randomness.
We will copy the public key (4) and private key (5) generated for our first permission, Owner. And we will repeat the process (3), (4) and (5) to generate another key pair for the Active permission.
We will keep the keys in a safe place and with care to identify well which are the Owner keys and which are Active them.
Changing the key format
WAX explorer uses the modern key system, but we will find that WCW still uses the old system so we must use another tool to change the format of the keys.
In the same section Wallet, Utilities, we change to the section Format Keys.
This tool allows us to change the format of a modern key to the old format (but it is still the same key).
We need to change the format of the previously generated Owner and Active public keys.
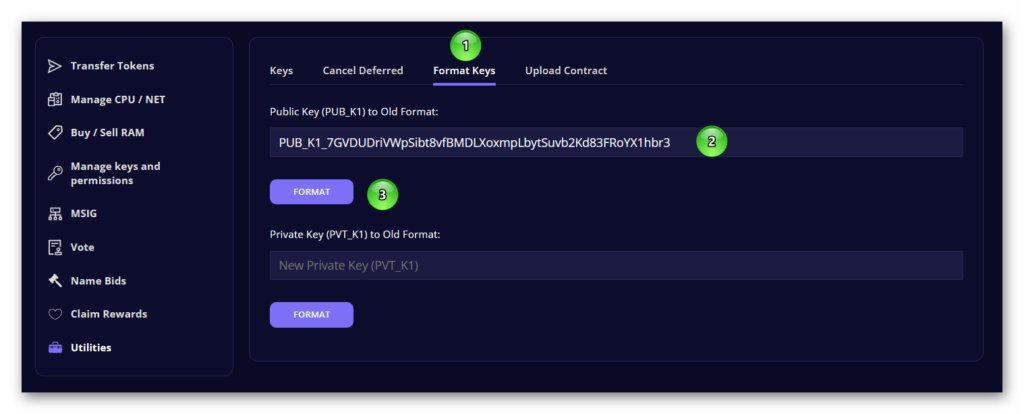
We will paste the public key in the text box (2) and click on the button (3) to show us the key according to the old format. This key must begin with the characters “EOS…”
We do not need to do it for private keys but maybe later, when we try to import our account into another wallet, we may need to resort to this tool again for it.
Claim your account from WAX Cloud Wallet
Once we have everything necessary prepared, we can proceed to claim the account. To do this we will go to the WAX Cloud Wallet website and log in (https://www.mycloudwallet.com)
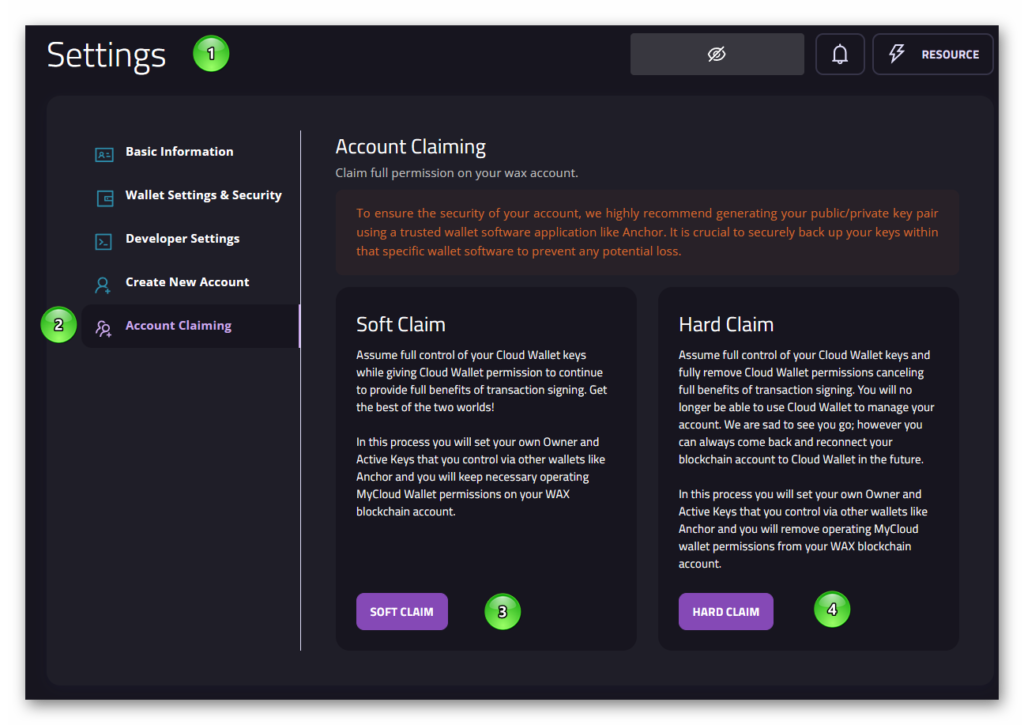
Once we enter the WCW management panel we can go to the Settings section (1) and there, to the Account Claiming section (2).
We will be shown two options to claim the account.
The first option, Soft Claim (3) allows us to have control and custody of the public and private keys of the account, but, at the same time, that the account remains linked to WCW, so we can continue to use the tools it puts at our disposal. As it says: “The best of both worlds”
The second option, hard claim (4) includes key management as in the previous section, but also unlinks the WCW account entirely. We will no longer be able to use WCW to log in or enjoy its tools; We must do it already from third-party wallets, such as Anchor or Wombat. However, there is an option to re-associate the account with WCW in the future.
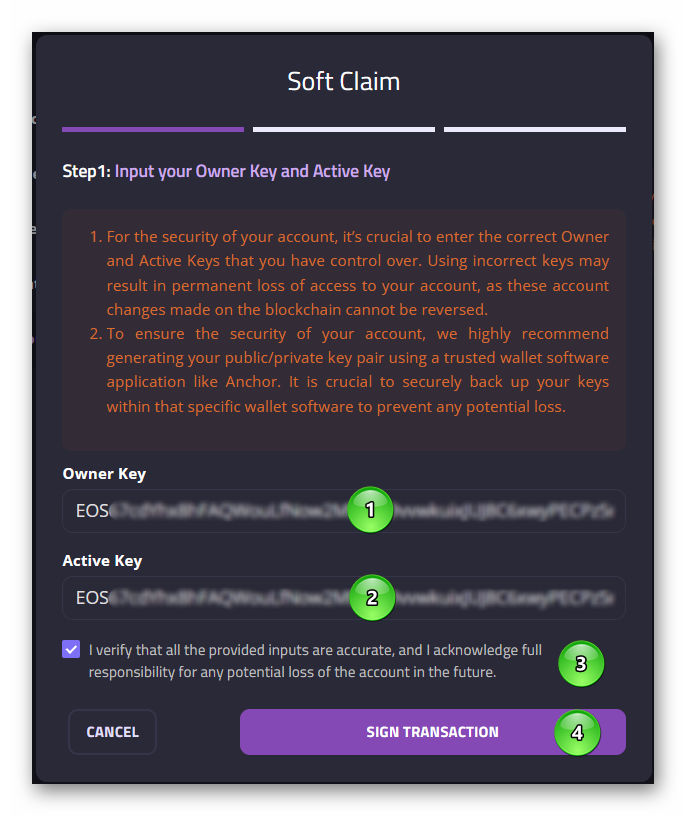
If we select the “Soft Claim” option, the most recommended to start, we must enter the PUBLIC keys for the Owner (1) and Active (2) permissions using the old key format (they start with EOS…). If we have followed the preparations section of this guide, we already have those keys at hand.
It is important to read the information that is displayed and in which basically what is indicated to us is that we make sure to use the correct keys since, otherwise, we can lose access to the account.
We select the compliance box (3) and sign the transaction to initiate the account claim request.
In the next step, a security code will be sent to the email that we have associated with the account to have a higher level of security that we are really the ones who request the process.
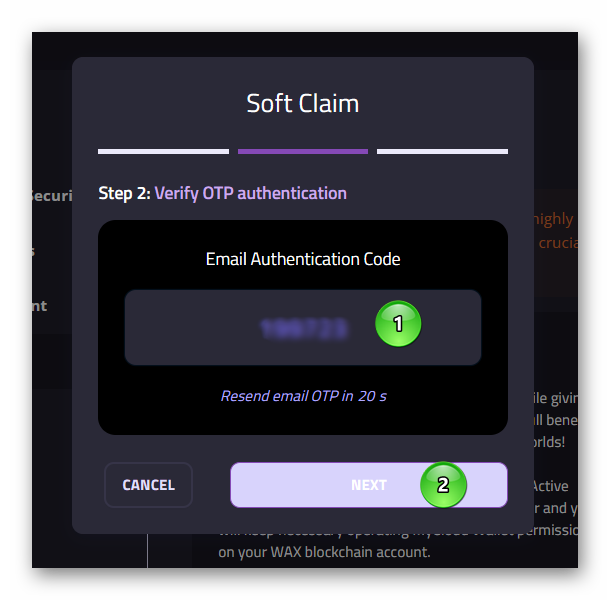
Enter the numerical key that we received in the mail (1) and press the Next button (2).
And now we just have to wait for the claim to end. From that moment we can link our WCW account to a third-party wallet such as Anchor or Wombat.
Hard Claim
Accounts claimed through Soft Claim maintain the multisig system with WCW so that the user can continue to use WCW to log in and to access the interface tools of their website. The user will be able to log in to other applications using other wallets such as Anchor or Wombat, but will not be able to sign transactions due to the multisignature system.
With the Hard claim, the multisig is eliminated, so the account is completely disconnected from the WCW service and controlled 100% by the user. You will no longer be able to log in through WCW anywhere but you can link the account to a wallet such as Anchor or Wombat to do so and continue using your account as normal as do those users who have their own accounts.
The process to make Hard Claim is identical to the process for Soft Claim and can be done from the first moment or after having made Soft Claim.
If we regret having made Hard Claim (or need to link our account with WCW again) we can relink the account by following the steps below in the next section.
Relink a claimed account to WAX Cloud Wallet
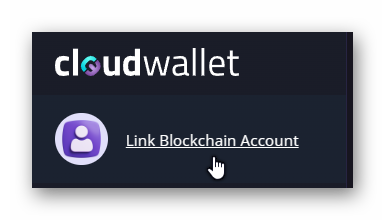
When we log in to the WCW site using the login method we had assigned (Gmail account, for example), we will see that our WAX account no longer appears but, instead, we have a link that says “Link Blockchain Account” that will allow us to associate a WAX account with WCW.
As we see, the system remembers our old account and tells us that you can only recover that account, that is; We will not be able to link a different account than the one we had.
As an identification method, it offers us to login with Anchor, since it will be necessary to sign a transaction that will reactivate the multisignature. We must have linked our WCW account with Anchor before starting this process.
IMPORTANT! We are going to perform an authorization at the account ownership level to allow WCW to sign for us (multisignature). To authorize this operation it is necessary to use the Owner permission so we must import our account with the Owner key into Anchor. Once the process is complete, it is advisable to clear the Owned permission from Anchor to avoid future problems. Deleting an account in Anchor (or any wallet) does not affect the account itself; only to the possibility of continuing to use that wallet to log in or sign transactions. We can always relink the account thanks to the keys that we will always keep in good care.
When you ask us to sign the transaction we will see the Anchor signature window similar to this:
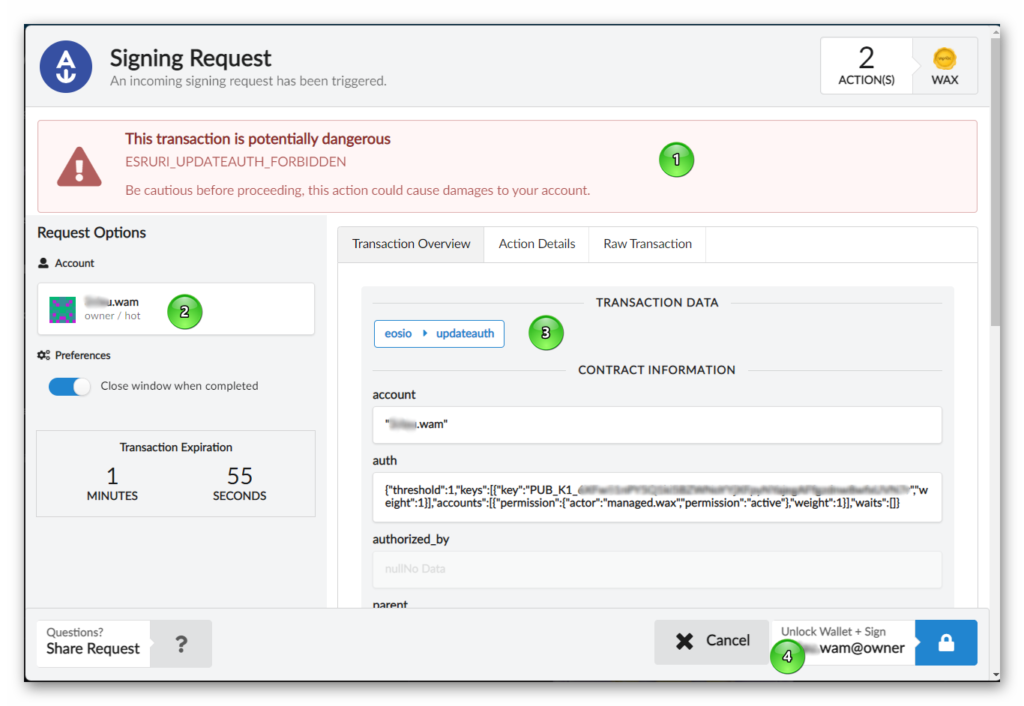
The first thing that catches our attention is the warning in red (1) that indicates the seriousness of this operation, since it involves giving permissions to a third party on our account thanks to the action “updateauth” (3). It is convenient to look at what is signed and make sure that we are sharing the “Active” signing permission with the “managed.wax” account, owned by WCW.
We make sure that we are going to sign the transaction with the Owned permission of our account (2) since, otherwise, an error will occur and the operation will be rejected.
We accept by clicking on the button (4) and we will see the following message:
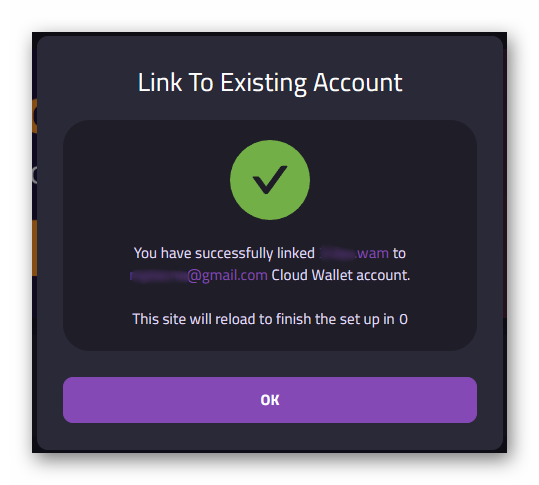
Our account has been linked again to WCW as if we were in the case of Soft Claim.
